Scanner Tip: Indoor Antennas

Chances are, if you have a scanner in the house, you have wondered if you need an outside antenna. While an outside antenna will almost always work better than an indoor antenna, sometimes that just isn’t feasible. If you live in a rental property, apartment or condo, or in an HOA restricted area you may not be able or allowed to install an outside antenna. Sometimes you just don’t want to go thru the work to do it. Maybe the spouse or significant other just won’t allow it.

There are alternatives, but as they are also compromises, they may work as well. They may however be good enough to allow you to listen to your targets. Depending on your unique situation, some or all of these ideas may or not work for you. Remember: There is never a guarantee that any of these ideas will ensure that you will be able to monitor your targets.

Let’s start with the simple ideas first. Your new scanner comes with a back of the set (or side of the set for a Home Patrol) antenna. This is usually a metal telescoping rod or a rubber-duck style antenna. Sometimes better reception may be had by a simple relocation or tilting the existing antenna. Maybe move the radio with its antenna closer to a window or away from the large metal objects will help.

The next step would be a better BOS (Back Of Set) antenna. ScannerMaster sells a variety of antennas, from direct replacements (if you lost or broke the one that came with the radio) as well as more advanced antennas. If you mostly monitor 700/800 MHz. systems a specialized antenna for these bands will work better than a general use antenna.

If these don’t help, then you may need a remote inside antenna like the Nomad. The Nomad is a wire antenna and is amplified (active). This allows you to mount the antenna in a better location and leave the radio where you want it.

The next step might be using a base station antenna indoors. ScannerMaster has several of these types. Basically this means a base station antenna with some sort of base to support it along with appropriate coax and connectors. These can be set up on a balcony or behind the drapes for aesthetic purposes.

You can also try a mobile antenna adapted to home use. Try a magnet mount antenna on top of a large metal cabinet, window air conditioner or balcony railing. Window mount antennas can be mounted on an apartment window just like you would on a car. Suction cup mounts work in a home just as well as in a car.

If you have access to an attic then you might try putting a base station antenna there. Try to stay away from large metal objects. If you have metallic shingle liners or solar panels they would likely interfere with your reception.

If you install an antenna outside, either on the roof or a tower, make sure to properly ground the installation to protect from lightening and watch out for electrical wires! Consider having them professionally installed. Use a high quality coax. Usually thicker cables work better at higher frequencies and longer distances. 50 or 75-ohm cable is fine for scanners since you will not be transmitting thru them. We will have a blog post soon all about Coax!

Please follow and like us:
RSS
Follow by Email
Twitter
Visit Us
Follow Me
YOUTUBE

When bad things happen to good scanners: Heap Errors

On certain Radio Shack, GRE and Whistler scanners, specifically the ones using Object Oriented programming, one can be beset with an error message that reads “Heap Error” along with some seemingly random text.

These are caused when the radio doesn’t know how to deal with an Object programmed into the memory, usually a Talkgroup (TGRP) not assigned to a  Trunked System (TSYS).

If you can get into the radio programming you should make sure ALL talkgroups entered as Objects are assigned to a Trunked System. This is pretty easy to do in ARC500 or other programs but a lot more difficult without software. These radios are hard enough to program manually let alone find orphaned TGRP objects.

When programming by hand be sure to associate every TGRP with a TSYS BEFORE saving it. When programming with software sort the TGRP list by TSYS and make sure all are assigned to a TSYS. If it says “New” for the TSYS then you need to change or delete the TGRP. Also check for duplicates in your list of TGRP’s. These can also cause errors.

If you don’t have software to program the radio and can’t get into the radio to edit the objects you may well have to reinitialize it and start all over. (Press 0, then 1, then enter during the startup screen.) While this will erase the radio it will get rid of the dreaded Heap Error. If you have software you can usually read the radio even if a Heap Error is present.

Object Oriented programming is used for the following scanners:

GRE: PSR310, PSR410, PSR500, PSR600

RadioShack: PRO-106, PRO-197, PRO-651, PRO-652

Whistler: WS-1040, WS-1065

Please follow and like us:
RSS
Follow by Email
Twitter
Visit Us
Follow Me
YOUTUBE

Scanner Tip: Antenna Connectors       

Ever wonder why some scanners have different type of antenna connectors? Ever wonder what BNC, SMA or PL259 stand for? Read on and learn!

Most scanners these days have either a BNC or an SMA antenna connector. BNC’s are the ones with the round barrel (about the same diameter as a pencil) and 2 little nubs that you twist on and off to. SMA’s are smaller threaded connectors. Both SMA and BNC mounts have a small center conductor that is surrounded by a ground that is the barrel.

Why are these used for scanners? Well, it is because they work well at a reasonable cost. For years the BNC has been pretty much the standard scanner antenna connector, replacing the old “Motorola” antenna connect that had been around since dirt was invented. Some old scanners used the “UHF” connector. Almost all scanners over the last 10 years or so use either the BNC except for some handhelds that use the SMA.

Until scanners started to standardize on the BNC handhelds use a wide variety of connections, including several different threaded connectors, earphone style plugs and permanently mounted antennas. Most mobile or desktop scanners used Motorola connectors since these were also used on most car radios. Some old scanners used SO-239’s (the female part of the UHF connector), which were common for CB’s and other two-way radios. By the 1980’s many scanners started showing up with BNC’s, both handhelds and base/mobiles.

As handheld scanners shrunk in size some started having SMA connectors replacing the BNC’s. This save a bit of room but forced the manufacturers to produce new antennas and include adaptors. Some scanners that have SMA’s also come with a BNC adapter to allow you to use your existing BNC antennas and accessories, ScannerMaster also sells these adapters.

BNC’s is a bayonet type connection. These press in, with the nubs fitting into grooves. They get locked in with a slight twist and this provides a good physical and RF connection.

SMA’s are a fine threaded connection, the connector itself is smaller than the BNC, both inside the radio and out. With smaller radios, like the BCD396 series, this little bit of extra space helps. Since most scanner users already have BNC antennas, coax connectors and accessories, the manufacturers often include an SMA to BNC adapter to let you use all your existing goodies. Some high-end radio receovers come with “N” connectors. Look close at these and you might notice that a male “N” connector will fit onto a female BNC. They were developed by the same guy, the “N” in both connectors comes from his last name: Neill.

BNC connectors get their name from the bayonet layout (“B”), and the developers, whose last names started with “N” and “C”. SMA stands for “Sub-Miniature Type A”. There are also SMB and SMC but you will likely never see one.

Many two-way radios these days use “Mini-UHF” connectors, these are smaller versions of the venerable UHF connectors. “UHF” connectors actually do not work well on UHF frequencies. The original UHF connector was so named before WWII, when anything about 30 MHz. was a radio wasteland suitable only for hobbyists and experimenters.

All these connectors come in a Male or Female version. This is based on the center pin/socket. The connectors with a pin are male. The UHF connector is a little odd, in that it has common names for the distinct parts. The SO-239 is the female, used on the radio while the PL-259 is the male used on the coax. “SO” stands for Socket, “PL” stands for Plug. Most other connectors use the same name but with female/male parts, such as SMA, BNC and N.

Please follow and like us:
RSS
Follow by Email
Twitter
Visit Us
Follow Me
YOUTUBE

Scanner Tip: It is a Digital World!

Many areas of the country have switched to “Digital”. What does this mean for the scanner listener? What is “Digital” anyway?

First, before we go any further, the number one question we get about digital scanners is whether they will also work on analog. The answer is YES. All digital scanners work just fine on analog channels, always have and always will.

Digital radio means that instead of using a regular AM (where the amplitude [strength] is changed) or FM (where the frequency is modulated or changed) signal , a digital signal type is used. This is a signal that is converted to the base 0’s and 1’s, compressed, and sent out on the airwaves. A digital receiver then converts it back and lets you hear it.

There are several types of digital that are of interest to scanner listeners. The most common for police, fire and other public safety use is APCO’s P25 system. This is widely used by both trunked and conventional (non-trunked) radio systems across the country. Several manufacturers, like Motorola, Harris and others sell P25 systems and equipment. While the P25 standards are supposed to ensure that any companies radios will work on the various systems, in practice some companies often add new “features” that tend to lock out other company’s radios from working with the system.

P25 comes in several flavors. “Phase 1” is the original single channel-per-frequency protocol used on conventional systems and most trunked P25 systems. “Phase 2” P25 effectively splits channels using TDMA (See technobabble below) to allow 2 simultaneous conversations on the same frequency, effectively doubling the capacity of a trunked system. If your system uses Phase 2 be sure to get a Phase 2 capable scanner!

Technobabble here: Phase 2 uses Time Division Multiple Access, more commonly known as TDMA. The radio system divides a radio signal into timeslots of tiny fractions of a second. In Phase 2 systems a certain time slot is assigned to the “0” channel and the other slots are assigned to the “1” channel. This allows 2 conversations to be held at the same time on the same frequency. The communications are restored at the receiver so it can be processed and heard by the user. Decoding software like UniTrunker or Pro96Com will show these sub-channels as “851.0375/0 and 851.0375/1”.

Some areas of the country have gone to a system called “OpenSky”, manufactured by Harris. While these systems have not been successful in many instances, the systems in place cannot be monitored by scanners. Harris has since dropped OpenSky from its catalog and is selling P25 systems now.

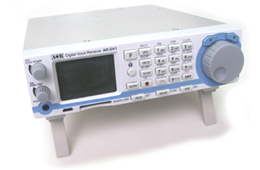
One trend that is growing in some areas is the use of various “DMR” systems. These are sold under various trade names like MotoTRBO, NXDN and others. They all use fairly similar digital protocols but current consumer scanners do not cover them. There are some SDR (Software defined radio) and advanced receivers (like the new AOR DV1) that will allow one to monitor these systems. The reason many agencies select these is usually cost, the radios are fairly cheap, especially when compared to P25 radios. While they may not be as durable, the replacement costs are often less than a repair would be. Businesses however have embraced these cheaper forms of digital radio and they are common on business channels. Railroads have agreed on using NXDN digital modes but implementation has been very slow. Ham radio operators use some of these also, as well as D-Star.

Do not confuse digital voice with encryption. While it is true that many digital systems are encrypted these days, most are not and these are perfectly legal to listen to. Also do not confuse digital voice with digital data. Most police and fire agencies use some sort of data systems for MDT’s or video, these systems cannot be monitored without huge budgets and massive computing power. Listening to digital transmissions on an analog only scanner will not work, you will just hear noise.

Some people hear and understand received digital communications better than others. The absence of background noise sometimes makes it uncomfortable for some users, since it can be mistaken for non-radio conversations. Digital certainly sounds different than analog but occasionally causes issues with things like firefighters protective gear. Usually it is just a matter of getting used to how it sounds. In addition, when digital signals are weak they tend to get garbled. Many agencies call this “going digital” since it makes a weird noise.

Digital scanners are more expensive than analog ones. This is mostly due to licensing requirements for the technology. While prices have gone down recently they still are usually about twice as expensive than analog scanners with similar features.

Will there be more scanners with DMR modes like TRBO and NXDN? We don’t know yet, but if and when they do become available we will be among the first to have them. The AOR DV1 is available now and does receive several of the digital modes.

Please follow and like us:
RSS
Follow by Email
Twitter
Visit Us
Follow Me
YOUTUBE

AOR DV1 Firmware Alert

The AOR DV1 has another new firmware update (v1507f) available at http://www.aorusa.com/support/firmware.html.

Below are the updates included in this release. Future releases will address other issues. Please contact AOR directly at http://www.aorusa.com/ with questions and suggestions.

The installation instructions are fairly simple, copy the firmware file to the SD Card, turn the radio on and press a couple keys. The instructions are included with the file.

Following features have been implemented:

* Backup to and restore from SD card

Following bugs have been removed:
* Fixed “auto-store” bug when SEARCH is running.
* S-Meter indicator stayed sometimes on even though power was off.
* When the file 99999999.wav was present in the SD card, the next recording was mistakenly named 10000000.wav. Now the recording after 99999999.wav is made impossible.
* Priority receive was not always functioning.
* Could not go out of settings screen after priority receive activation.
* Receiver would not restart properly if the function key was pressed before switching the receiver off.
* Invalid characters on LCD when time settings accessed during memory receive.
* Incorrect memory channel content switch when priority mode was activated during memory scan
* When erasing a search bank the LCD froze on “writing” indication.
* Memory bank editing was not possible during SCAN.
* Erasing search bank 39 in search group settings was impossible.
* Auto-store function: If memory bank 39 was full, channels 46 to 49 were not kept in memory after a reboot.
* Invalid characters on screen when “writing” was displayed.

FUNCTIONS AND BEHAVIOR CHANGES:
* When SEARCH is stopped and the [ENT] key pressed, the currently received frequency and settings are copied to VFO-Z.
* VOL/SQL maximum value changed from 100 to 99.
* (PC remote control through Hyperterminal commands). When receiver is turned off with the QP command and USB cable disconnected, the next time the receiver is turned on through the front panel, it will start in a “non-remote control” state.

Please follow and like us:
RSS
Follow by Email
Twitter
Visit Us
Follow Me
YOUTUBE

Scanner Tip: Everything you need to know about trunking but were afraid to ask

In the old days of scanning things were pretty simple, you put in the local police frequency to listen to the police. In many parts of the country however, this no longer works. Most cities, many counties and even entire states use Trunking Systems. What are trunking systems and how do they work?

The best way to explain how a trunking system works is the analogy of a set of bank teller lines. The bank has 5 tellers, you can line up at any of the 5 lines and hope your line goes faster than the others. Then you get stuck behind the lady that wants to have her penny jar counted by hand…

These days however, banks have a single queue and you go to the next available teller when you reach the head of the line. This is exactly how a trunked radio system works: All users are in one queue and get assigned the next available channel. Instead of having a separate frequency for the FD, one for the PD and another for the ambulance, they just go to the next channel that isn’t being used.

All this is controlled by a computer system called, appropriately enough, a “Controller”. The Controller watches the system and when a radio requests to talk it assigns that radio and any other radio in its group to a channel. All this happens in a fraction of a second.

Radios have all the frequencies used by the system programmed into them and the system is broken down into various virtual channels, called “Talkgroups”. Talkgroups are assigned to various uses like channels would have been before. For example, Mayberry PD might be assigned Talkgroup 101 for Dispatch, 102 for Car-Car and 103 for Detectives. Mayberry FD might be assigned Talkgroup 123 for Dispatch, 124 for Fireground and 125 for Tactical. If Mt. Pilot is sharing the system they might be assigned Talkgroup 287 for Police Dispatch and so on.

There are several types of trunking systems but they all work in much the same way. There are differences in the way they get programmed into scanners as well. The main types of trunked systems in use by Public Safety agencies in the USA include Motorola, EDACS, LTR, APCO25 Phase 1 and APCO25 Phase 2.

For scanner listeners these trunked systems add a layer of complexity to the programming. Depending on the type of scanner and the type of trunked system the method used to program differs. For newer Unidens you program in a “System” to identify the type of trunking, then “Sites” to put in the frequencies used and lastly “Groups” for the talkgroup listing. Whistler, GRE and Radio Shack scanners with Object Oriented programming work differently. On LTR and EDACS systems you have to identify the proper “LCN” channel numbers, these are usually well documented at www.radioreference.com. Motorola and APCO25 systems do not need the frequencies in any particular order.

HomePatrol and other scanners with the Database feature will have these Trunked System parameters already programmed so you can just select the Service and location to listen to them. They do all the heavy lifting for you.

Keep an eye on the ScannerMaster Blog for our explanation of Digital operations!

Please follow and like us:
RSS
Follow by Email
Twitter
Visit Us
Follow Me
YOUTUBE

Drivers? What are they and why do I need them?

If you have a scanner and a computer you will most likely want to use one with the other. Computer programs (like ARC products) are great for programming and controlling scanners.

Windows however tries to make life difficult for us and requires almost everything we connect to a computer to have “drivers”. Drivers are basically small programs that allow the computer and device to talk to each other, kind of like an interpreter.

If the stars are all aligned and all is well with the world the device driver will load automatically when you plug in the device. If not then you will have to install a driver to make it work.

We have a link here that helps scanner users get drivers and load them. This page also links to download pages for the drivers needed by many scanners.

Depending on the scanner you have the driver might be connected to the radio or to a separate cable. If your scanner has a standard USB port on it (such as a HomePatrol, a BCD996P2, BCD325P2 or some of the other newer model Uniden and Whistler scanners) then the driver goes to the radio itself.

If you have an older radio with a USB-serial adaptor cable, such as a BCD996XT, BCD396XT, PRO106, a PSR 500/600 etc. then the driver is matched to the cable (like the Uniden USB-1, or the blue, orange or black RadioShack/GRE/Whistler cables). Once the cable has the proper driver installed and a serial port (Comm-X) number assigned it can be used for any compatible radio with no further issues.

Some radios use an old fashioned serial port with a DB-9 connection, either on the radio or it’s programming cable. These require a serial port on the computer itself or the use of an USB-Serial adaptor. If you use a USB-Serial adaptor then the drivers connect to the adaptor.

The common denominator for all this is that the radio gets a “Com Port” number assigned. This will show up as “COM1” , “COM36” etc. Once this number is displayed in the Device Manager use that number in your programming software so the radio and program can communicate. This is kind of like a channel number, if the radio and computer are both set to the same Com Port number they can talk.

Com Port and communication issues are the biggest problem faced with users of software and scanners. Once you get the drivers loaded and the program set to the right com port then you can read and write to the radio all you want.

Some older USB-Serial adapters and cables will not work with some newer versions of Windows, or with 64-bit versions of Windows. Others require newer drivers to be downloaded and installed. Once installed the drivers should automatically be loaded each time you plug in the cable but sometimes Windows may change the com port number so if you have problems check the Device Manager to make sure.

Please follow and like us:
RSS
Follow by Email
Twitter
Visit Us
Follow Me
YOUTUBE

Scanner Tip: Why doesn’t a charger come with my scanner?

Until recently most handheld scanners came with an AC wall charger/power supply and some even came with mobile power cords for the car. Newer models these days often do not. Why is that? Is Uniden or the others trying to save a buck here and there? Is there a conspiracy to sell more chargers?

Well, the answer is complicated and there are a couple reasons involved. The most important is that the various manufacturers are switching many portable devices, including scanners, to charge off of common USB devices. Since many different devices are going this route, like cell phones, headsets and others, scanner manufacturers are following suit. This lets consumers use a single charger with many devices. This is a good thing! Sure, scanner makers might save a buck or two here but so will you.

Another reason is regulatory. Some states have set up rules to govern consumer electronic devices including scanners and cell phones; USB charging is one way to comply with these rules.

By using USB to charge or power your scanner you can use any of the several chargers you likely already have at home. If you are reading this you almost certainly already have a USB charger. Don’t think so? How about the computer? If it has a USB port chances are it will charge your scanner just fine. Got a cell phone or tablet? Chances are it comes with a USB charger. The cable may be different but the USB charger will probably work with the scanner.

Newer scanners with USB usually come with the USB cable. This is used for both programming and charging. Older Uniden scanners, like the BCD396XT, have serial ports instead of USB and have non-USB charging ports. GRE & Whistler built scanners have either a direct USB port (like on the WS-1095) or serial ports (such as the older PSR500/PSR600)

The USB cable that comes with most scanners is called the “USB-Mini”, most newer non-Apple cell phones and cell phone accessories use the “USB-Micro”. You can usually use any USB-Mini cable for the scanner so there is a good chance you already have some lying around. Leave one in the glove box to charge the scanner in the car and another in the camera bag. ScannerMaster sells replacement cables as well.

Another thing to remember is that handheld scanners will generally NOT charge the battery while the radio is turned on. USB has limits as to the power available so if you need to charge the batteries turn the radio off. USB will power the radio if the batteries are dead or missing but it cannot power and charge at the same time.

If you don’t already have a spare USB charger and cable or two lying around ScannerMaster sells them for both the house and the car. You can also use external battery chargers; these tend to charge faster than charging in the radio. (AC Adaptors)  (Mobile Adaptors)

Also remember that while most handheld scanners these days use AA batteries you cannot charge Alkaline cells. Do not try to charge alakalines. They tend to leak, burn or do other nasty things that can destroy your radio and melt your brain if you try to charge them.

One more note to remember: Base/mobile scanners that have USB ports but that do NOT run on batteries (like the BCD996P2 or BCD536HP) cannot be powered by USB, they need their included AC adaptor or some other source of 12 volts DC. These scanners use the USB port for computer access only.

Please follow and like us:
RSS
Follow by Email
Twitter
Visit Us
Follow Me
YOUTUBE

Scanner Tip: Antenna Matters or Antennas Matter!

If you have a scanner then you have an antenna, they don’t work well without them! Scanners will usually work better with better antennas. Makes sense, right?

So the next question is: What is the best antenna for me? The answer that age-old question is: “it depends”…

For many people using handheld scanners the antenna that came with it will often work just fine. If you are listening to local stuff then it probably is just fine. There are aftermarket antennas that will often work better for you, increasing the distance you can hear signals from or the strength of the signals you do hear. (Handheld Scanner Antennas)

All antennas are compromises. You have to balance size, construction and cost with the need for frequency range and portability. As a rule larger antennas usually work better than smaller ones, but that is not a golden rule.

Handheld scanners usually come with a “rubber ducky” style antenna. If you were to x-ray one or take it apart you will see that it is a coil of wire that looks like a spring, wrapped in rubber. This makes it flexible (so it doesn’t break) and allows more apparent length in a smaller package. These usually work pretty well for the most popular scanner bands (VHF-Hi and UHF) but not so good for VHF-Lo and 700-900 MHz.

You can buy a band-specific antenna, such as one made just for 800 MHz. While these will still work on other bands they will work best on the band they were designed for. If you use your scanner only for a specific band then consider an antenna for that frequency range for best performance.

If you use a scanner in the car or truck then some sort of outside or window antenna is almost always required. Remember that you are driving what is essentially a Faraday Cage, a metal cased vehicle that may also have metallic linings in the windshield. Unless you are listening to VERY local communications then you will likely need some sort of mobile antenna. These range from simple and inexpensive to complicated and expensive. (Mobile Scanner Antennas)

ScannerMaster makes several inexpensive and easy to install antennas for the car that will really work well for most casual scanner listeners. We have an antenna that looks like the cellular window mount antennas and another that mounts inside the windshield or back window. Another choice might be an outside magnetic mount antenna.

If you have a more professional need for a mobile antenna then we have several trunk-lip or hole mount antennas to choose from. These require installation by either a professional installer or someone who knows how to drill holes in a vehicle and route wires.

For reception in a home, office or other building the biggest advantage is elevation. The higher you go the better your reception in most cases. The best place for an antenna is the roof, preferably at the highest point. The next best is in an attic. Remember that any exterior antenna requires proper grounding and lightening protection! (Home/Office Scanner Antennas)

If you cannot install an antenna on the roof or in the attic then consider one of our inside antennas. These can be placed in a corner near an outside wall or window or even on a balcony. If you have a window air conditioner then maybe a magnet mount mobile antenna will work for you. Live in a high-rise? Try one of the inside mobile window mount antennas.

When buying a base station antenna to mount outside remember that some do not include coax and other necessities.(Antenna Coax) Remember that you need a place to mount it, like a TV antenna mast or vent pipe. Make sure you also account for the connectors, if your scanner has a BNC make sure you have the proper connector or adaptor. (Antenna Connectors)

In future Scanner Tips we will discuss antenna connectors, keep watching for that!

Please follow and like us:
RSS
Follow by Email
Twitter
Visit Us
Follow Me
YOUTUBE

Firmware Alert – AOR AR-DV1

AR DV1 firmware update:  v1505G, 6-5-2015

AOR has uploaded revised firmware for the AR-DV1 receiver. While this update will correct issues that some customers experienced, it also adds more functionality to the AR-DV1. AOR is committed to the continuous improvement of its products and will post firmware updates periodically to further extend the capabilities of this receiver.

The new firmware version: 1505G is now available for download from the AOR website.
Directions: AR-DV1 Firmware Update Procedures 

AR-DV1 Multi-Mode Digital ReceiverThis firmware will correct:

  • Malfunctions with the backlit keys lighting up while the power switch is in the “off” position
  • D-STAR signals overriding the selected mode for received data. The decode mode will now decode and display only the selected mode.
  • Malfunctions with the receive frequency when CTCSS or DCS is selected during Search mode.
  • Problems with pressing LOCK key or MONI key when frequency entry is made from the keypad
  • Issues with the display data freezing when digital data is displayed while using the keypad or rotating the dial knob.
  • Issues with the opening message displaying properly.
  • Memory channel registration problems. Entering the memory tag followed by pressing DOWN key will now work properly.
  • Voice squelch function stability
  • SAL/SAL or USBL/LSB operational issues
  • D-CR code setting error
  • Analog FM mode function
  • Initial power-up cycle
  • Problems with “motorboating” noise in DMR mode
  • Problems adding receive mode, IF B/W, CTCSS/DCS in memory scan mode and program search mode.

New enhancements for the AR-DV1 available with this firmware include:

  • Ability to open the squelch while in digital mode by pressing MONI key
  • Ability to save the current receiver settings by pressing [F]+[VOL]
  • Easier frequency entry during search bank setting by using the [.] (decimal) key for frequencies below 1MHz.
  • In memory mode or program search mode, receiver options can be added.
  • SD card FAT16 is now supported
  • Remote ID can be added to last channel memory
  • The AR-DV1 will send a message showing connection status during on/off process.
  • Step frequency can now be set during search or scan mode
  • The following PC commands are now supported: MD ZJ ZK SQ NQ LQ VQ ZP QP EX AG RF ST SH DT BP LN LB LD KL PT ZI LC LM RX LT RT RE SB WI RN VR
    AC RG IF LS NR OF OL OX SC SI DL FR CI CN DI DS DC DJ DK
    (A complete list of new functions will be posted soon.)
Please follow and like us:
RSS
Follow by Email
Twitter
Visit Us
Follow Me
YOUTUBE