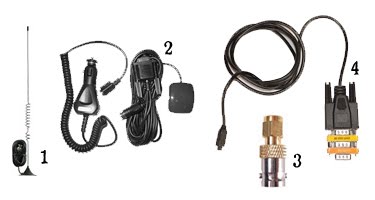
New Product – Uniden HomePatrol

By Jonathan Higgins

The Product: Uniden HomePatrol-1

The much awaited Uniden HomePatrol’s will be shipping out on Thursday, September 30, 2010.

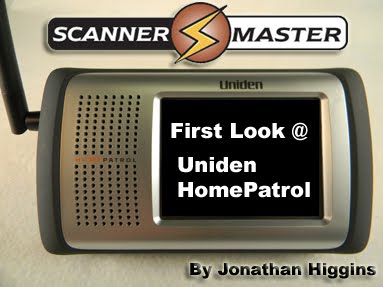
Please check out my First Look @ Uniden HomePatrol
Highlights:

Please follow and like us:
RSS
Follow by Email
Twitter
Visit Us
Follow Me
YOUTUBE

New Product – Setup & Optimize Service

By Jonathan Higgins

Product Name: Setup & Optimize Service (for the Uniden HomePatrol and GRE PSR-700 only.)

Cost: $39.95 – If the scanner was purchase from Scanner Master
($49.95 for customers that already have purchased the scanner elsewhere)

Note: This service delays the shipping one week.

When you order this option along with your Uniden HomePatrol and GRE PSR-700 the Setup & Optimize Service Covers:

  • Optimizing the internal database
  • Checking and updating the firmware
  • Setting-up your local town/city into a Scan List/Favorites List
  • With Scanner Master’s exclusive Set-up & Optimize Package we see to it that you’re pre-programmed scanner is fully updated and ready to use for your area, perfect for your own use and especially perfect for a gift. First we optimize the internal database by updating the frequency library, which changes daily. We will also check and install any firmware updates to before your pre-programmed scanner ships. (The firmware is the operating system for the radio which may have been updated or tweaked by the factory following its production in Asia.) Scanner Master will then build a Favorites List/Scan List for the customer (based on the ship to address of your order), or for the area in which the scanner will be used if the customer specifies a different city (for example if the radio is given as a gift).


    — Bellow applies to the Uniden HomePatrol ONLY. —
    (The benefit of this Favorites List work is that we insure that the most important data to the user is readily accessible as often times, if the database for the end user’s area hasn’t been completely prepared with what’s known as “geo-tagging” then some or all of the local agencies will not activate for scanning. Scanner Master insures that this will not be the case.)

    Scanner Master will also pre-tune the radio by entering the end-users zip code. Finally we will give the radio’s installed re-chargeable batteries a brief charge to insure that the radio will be ready to use right out of the box.


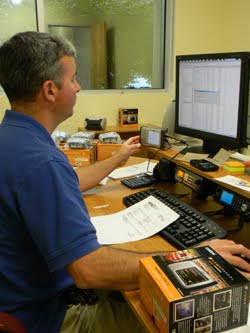
    Greg Jolly busy at work Setting up and Optimizing the New Uniden HomePatrol.

    Please follow and like us:
    RSS
    Follow by Email
    Twitter
    Visit Us
    Follow Me
    YOUTUBE

    New Product – GPS Accessory Kit

    By Jonathan Higgins

    Product Name: GPS Accessory Kit
    Cost: $19.95
    Available: Early October

    Included in this Kit:

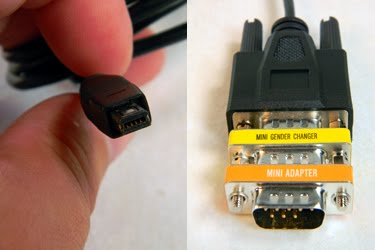
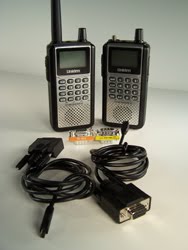
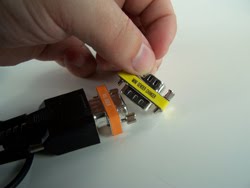
  • Null Modem
  • Gender Changer
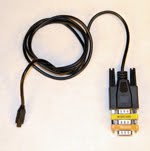
  • Uniden Serial cable
  • With the new GPS Accessory Kit you can hook up the following scanners to SpectrumForce GPS Receiver:

  • Uniden BC346XT
  • Uniden BCD396XT
  • Uniden BCD396T
  • Uniden BR330T
  • Uniden HomePatrol-1

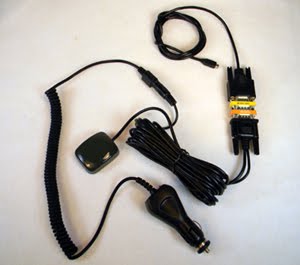
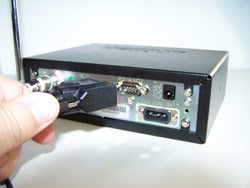
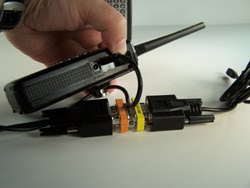
  • The photo bellow shows the GPS Accessory Kit hook up to the SpectrumForce GPS Receiver.

    Please follow and like us:
    RSS
    Follow by Email
    Twitter
    Visit Us
    Follow Me
    YOUTUBE

    Scanner 101 – Uniden RH-96 Remote Head Hook Up


    The Uniden BC-RH96 Remote Head is
    only available from Scanner Master!

    Using the Uniden BC-RH96 Remote Head
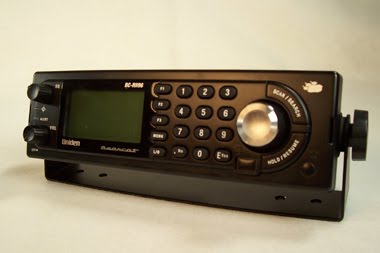
    Are you installing a new Uniden base/mobile Scanner in your car or truck? Most new vehicles don’t have a lot of space for a bulky full size scanner, so the Uniden BC-RH96 Remote Head is the perfect fix to any instillation. With the Remote head you can place the scanner under the seat or mount it in the trunk. With the compact BC-RH96 Remote Head you can have full control** of the scanner with full display taking up 75% less space. If you’re installing the BCT15X or BCD996XT in your vehicle, make sure you check out the Uniden Bearcat BC-RH96 Remote Head.

    **Note:
    When powering down the remote head, it will not power down the scanner itself.
    Size:
    7.2W x 1.9D x 2.2H in inches (without knobs)

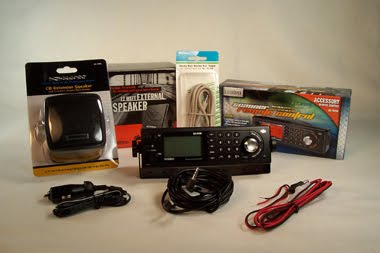
    Also In the box:
    Mounting bracket with Knobs
    10 foot data cable
    Cigarette lighter DC power plug
    The Owner’s Manual
    The Uniden BC-RH96 Remote Head works with the following Uniden Scanners:
    BCD996XT / BCD996T
    BCD396XT / BCD396T
    BCT15X/BCT15
    BC346XT
    BR330T

    Bring the Sound the Front
    When purchasing the Uniden BC-RH96 please check out our external speaker options available. You also need to bring the sound to the front along with the controls. The BC-RH96 does not have an internal speaker.
    Uniden 4” External Speaker – 10 foot cord
    RoadPro 2.75” External Speaker – 6 foot cord

    Simple 1,2,3 Remote head to Scanner Hook-Up
    Step 1
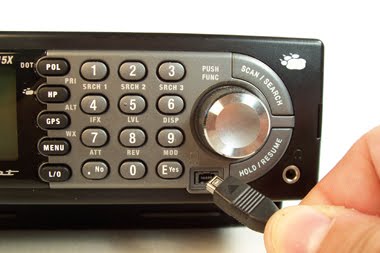
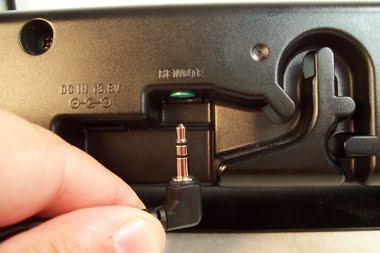
    Hook up the data cable to the scanner via the front PC Port.
    Step 2
    Hook up the data cable to the RH96 to the Remote port. This cable can be extended by using an optional 6 foot stereo extension cable or 25 foot stereo extension cable.
    Step 3
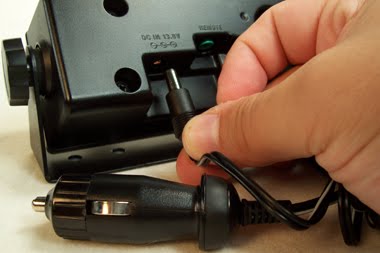
    Hook up your cigarette lighter power cord or using the optional Uniden Power Cable (it will plug directly into your fuse block).

    Installing Tips
    >> When placing the scanner in the trunk or under the seat make sure the scanner is in a location so will will not over heat. Try to avoid tight closed in spots.


    >> If you need to extended the 10 foot data cable that comes with the BC-RH96 you can purchase optional 6 foot stereo extension cable or 25 foot stereo extension cable. These cables can be use to extend the speaker cables as well.

    >> If your using multipliable cigarette lighter power cords you may want to purchase 12-Volt 3 Outlet Power Port Adapter.
    Programmable Function Buttons

    With the Uniden BC-RH96 you can program three function buttons.
    Options include:

  • Scan Key
  • Hold Key
  • Service Menu Shortcut
  • WX Scan Menu Shortcut
  • Goto Tone-out Standby Shortcut
  • Goto Close Call Only Mode Shortcut
  • and more!
    See the BC-RH96 Manual Pages 19- 21 for more details.

  • Optional Parts:

    External Speakers
    Uniden 4″ External Speaker
    Uniden 4″ Powered External Speaker
    Roadpro 2.75″ External Speaker

    Data and Speaker Extension Cables
    Stereo Extension Cable 6′
    Stereo Extension Cable 25′

    Power Options
    Uniden Power Cord (no cigarette adapter)
    Uniden Cigarette Lighter Charger Straight Cord – This already comes with RH96, if you need extra here is the part needed.

    Multi-port Mobile Outlet
    12-Volt 4 Outlet Platinum Series Power Port

    Please follow and like us:
    RSS
    Follow by Email
    Twitter
    Visit Us
    Follow Me
    YOUTUBE

    First Look @ Uniden HomePatrol

    First Look @ Uniden HomePatrol
    By Jonathan Higgins

    Release Date: Early Fall 2010 – 09/30/10
    Price: $495.00

    Uniden HomePatrol
    Recently I had the opportunity to see the New Uniden HomePatrol in action. This product is very simple to operate, you can be up and running within 3 minutes or less. No programming needed all you need is your zip code. Once your Zip Code is entered, HomePatrol will load Police, Fire and EMS channels in your area and you have the option to also scan Utilities, Airports, Railroads, Businesses, schools and other services in your area that area listed on the Radio Reference database.

    My initial thoughts of the HomePatrol:
    This cutting edge technology from Uniden will take the work out of programming. The menus are very straight forward and simple. The reception was amazing with the stock antenna that came with the unit. This product would be ideal for someone just getting into the hobby, or just looking for something that is very simple to operate.

    Advanced Users
    Advanced users may find the HomePatrol limits your ability to customize the programming. I would still recommend the Uniden BCD396XT or BCD996XT to advanced users. For myself HomePatrol would be great for traveling outside of my listening area, because I wouldn’t need to spend time setting up the programming.

    GPS ScanningHomePatrol would be a great for Road Trips too! By connecting a GPS Receiver the system will select all of the agencies in your area and it will keep updating as you travel.

    Building Favorites Lists
    You can make your own favorites Lists from the database in HomePatrol. If you only like to listen to fire call you can go into the database and select those departments. You can name and save each favorites list. I really like this option because you can customize what you’re monitoring.

    Instant Replay
    Did you miss a transmission? You can replay radio transmission from the last 30 Seconds to 240 seconds; you can set the replay time through the Advanced Menu options.

    Updating HomePatrol
    With the HomePatrol Sentinel PC Software you can update the internal database within minutes. When needed HomePatrol may need a Firmware update, these are simple and done through the software. Also with-in the software you can make and save your own custom Favorites Lists.


    HomePatrol Appearance and Jacks
    Screen:Full Color Touch Screen

    Buttons:
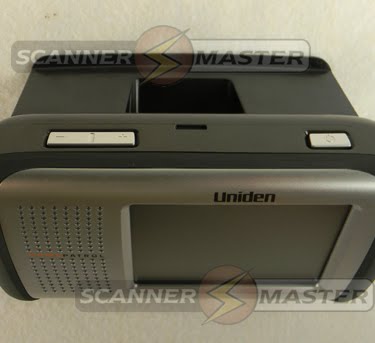
    Volume Control and Power Buttons
    Jacks:
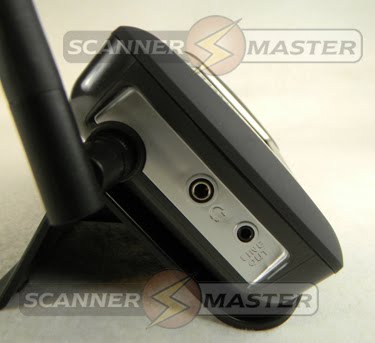
    Left to Right – SMA Antenna Jack, Head Phone Jack, and Line Out Jack
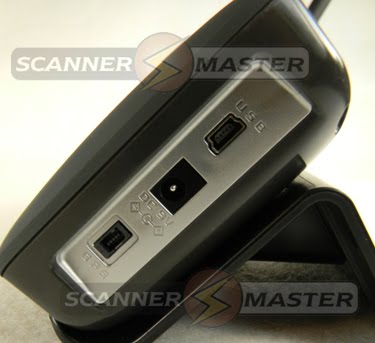

    Left to Right – GPS Jack, DC 9V Power Jack Jack, and USB – Programming/Updating Jack

    In the Box:
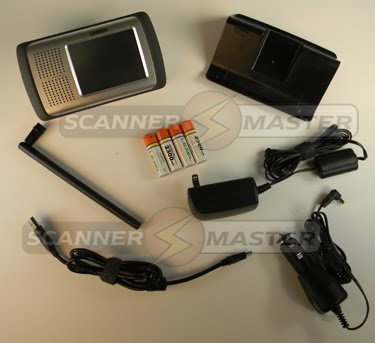
    HomePatrol will come with Flex Antenna, AC Adapter, DC Cigarette Lighter Adapter, 4 AA Rechargeable batteries USB Cable, Desk Stand, and a quick Start Guide.

    Frequency Coverage:
    25-54 MHz
    108-512 MHz
    758-960 MHz

    Communications Systems Covered:

  • EDACS Wide/Narrow
  • LTR
  • Motorola
  • Conventional
  • Digital (Project 25)
  • Analog

    Specifications for this unit are subject to change without notice by the manufacturer.

    Great Links:
    HomePatrol Offcial Website
    HomePatrol Yahoo Group
    HomePatrol Yahoo Group Links

    HomePatrol on YouTube:
    HomePatrol Launch Part 1
    HomePatrol Launch Part 2
    HomePatrol Launch Part 3

  • Please follow and like us:
    RSS
    Follow by Email
    Twitter
    Visit Us
    Follow Me
    YOUTUBE

    Scanner Master Road Trip – I-95 Maine

    By Jonathan Higgins

    Last weekend, the Higgins family took a road trip to Northern Maine to visit with family! Oh yes, cozy Maine, with its 60 plus lighthouses, 6,000 lakes, 32,000 miles of rivers, and digital communications systems. Yes, digital communications are coming to Maine! In past road trips to Maine I have that Biddeford Police used Project 25 (P25), in this trip I found more areas using digital. They are using a VHF conventional digital system:

    Auburn Police – 159.1500 NAC 293
    Augusta Police – 153.6275 NAC 770
    Biddeford Police – 159.9450 NAC 51 (Dispatch),
    and 156.2100 NAC 703 (Secondary)
    Lewiston Police – 158.7900 NAC 293

    Maine State Police
    Soon the Maine State Police will be upgrading their Analog VHF conventional system to a new Project 25 VHF Digital trunking system called MSCommNet (Maine State Communications Network). Right now this system is in the planning stage. They hope to have this up and running by fall of 2012.

    You can read more about this system on the Maine.gov website.
    http://www.maine.gov/oit/services/radio/mscommnet/index.html

    Handy Frequencies…
    Maine Turn Pike Ops – 151.0700 CTCSS 107.2
    Great channel to monitor for accidents, or lane closures. You can hear the motorist assistance trunks.

    Railroad Buffs
    A great place to stop anytime you’re making your way into Maine is the Seashore Trolley Museum, located in Kennebunkport, Maine.
    Main Dispatch – 160.4700 CSQ
    Secondary Channel – 160.5000 CSQ

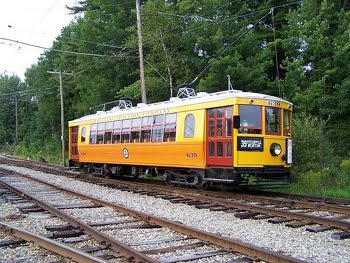
    Below is a photo of Wheeling Traction Co. #639
    1924 Cincinnati Car Co.

    Photo Taken by Jonathan Higgins
    (Seashore Trolley Museum Members Day 2009)

    Please follow and like us:
    RSS
    Follow by Email
    Twitter
    Visit Us
    Follow Me
    YOUTUBE

    New Product Austin Condor Portable Antenna with SMA

    By Jonathan Higgins

    Austin Condor All-Band Portable SMA Antenna

    The great Austin Condor is now available with a SMA connection. This multiband antenna packs a punch on all of the public safety bands 150-174- 452-512 and 806-896MHz with its tuned ¼ wave elements. The SMA connector is embedded in the “Condor’s” high density urethane housing to stand up to the toughest handling. Pull in the weak signals with “Condor” State of the Art Technology!


    Product Specs:

  • 12 inches long (Flex)
  • SMA Connector
  • Coverage:
    150-174 MHz
    452-512 MHz
    806-896 MHz

    This antenna is great paired up with the following scanner models:

  • Uniden Bearcat BCD396XT
  • Uniden Bearcat BCD396T
  • Uniden Bearcat BC346XT
  • Uniden Bearcat BR330
  • If you have scanner with a BNC Connection you can still get this great antenna in the BNC version!
    Austin Condor All-Band Portable BNC Antenna

    Please follow and like us:
    RSS
    Follow by Email
    Twitter
    Visit Us
    Follow Me
    YOUTUBE

    Product Test – GRE 800 MHz Rubber Antenna

    By Jonathan Higgins

    Product Tested: GRE 800 MHz Rubber Antenna
    Cost of product: $19.95

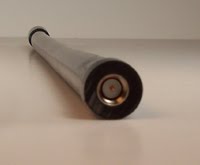
    Looking to improve your reception on the 800MHz? Over the past month Scanner Expert Greg Jolly and I tried out the “GRE 800 MHz Rubber Antenna“. Not only did it improve on the 800MHz reception we saw improvement on VHF-Hi and UHF system as well. This antenna comes with BNC connection you can convert this to a SMA with an optional “SMA to BNC adapter” for Uniden units. For $19.95 you can’t go wrong with trying this antenna!

    Product Spec:

    • 800MHz Rubber Antenna
    • Straight design
    • 7 inch size
    • BNC Connector


    Please follow and like us:
    RSS
    Follow by Email
    Twitter
    Visit Us
    Follow Me
    YOUTUBE

    Riding the Rails into Baltimore, MD

    If you like trains and railroading, like I do, bring your scanner with you the next time you take a train trip. It will give you an exciting behind the scenes look at railroading!

    Last weekend I took a trip on Amtrak Northeast Regional from Providence, RI to Baltimore, MD for a mini weekend vacation with my wife. I thought this would be a great opportunity to monitor railroad communications on the move rather than from my hobby room.


    My gear for the trip:

    Small notebookThis was the first time I used an ear-piece for scanning, the Shadow Earpiece was very comfortable plus I could enjoy listening without disturbing anyone else. This was the first time using AA Lithium batteries with my scanner… I put in a fresh set of batteries at the start of my trip and I never had to change them.Frequencies:
    I was able to find a few frequencies here and there online. This was a great opportunity to use the scanner “Railroad Service Search”and the (Uniden) Close Call feature.Below I found the Road Channels for each region along the Northeast Corridor from Boston to Washington DC:

    Boston, MA – New Haven, CT
    Road Channel – 160.9200 ARR Channel 54

    New Haven, CT – New Rochelle, NY
    Road Channel – 160.5450 ARR Channel 29

    New Rochelle, NY – Philadelphia, PA
    Road Channel – 161.0100 ARR Channel 60

    Philadelphia, PA – Washington, DC
    Road Channel – 160.9200 ARR Channel54

    What are Road Channels?
    For Amtrak these channels are used for the train crew and for train to dispatcher communications.

    Monitoring around Baltimore, MD:
    Once I got into Baltimore I switched gears from rail to public safety communications. The city of Baltimore has a 800MHz Motorola Type II Smart Zone Trunking system with 98% of the talk groups using digital (P25) voice communications. So a digital scanner is a must for this area. I was getting great reception in most area.

    Who is on the City of Baltimore Trucking System?

    • Fire
    • Police
    • Public Works

    ***As of right now this system is not rebanded.***

    I was able to monitor both Security at Camden Yards and B & O Railroad Museum from my hotel room a little over a mile away. I could also hear a lot of CSX Railroad communications as well.
    Please follow and like us:
    RSS
    Follow by Email
    Twitter
    Visit Us
    Follow Me
    YOUTUBE

    Scanner 101 – Cloning Uniden XT Scanners

    Have you ever wanted to clone your programming from Uniden BCD996XT to another Uniden BCD996XT?
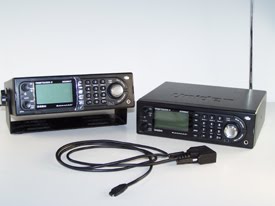
    Here are the models you can clone:***

  • BCT15X
  • BC346XT
  • BCD396XT
  • BCD996XT

    ***Note: You can ONLY clone from the same model to another of the same (like BCT15X to BCT15X or BC346XT to BC346XT and so on).

    Here is how you do it….

    Directions how to clone BCD996XT or BCT15X:

    Parts needed:
    1 Uniden 4′ Serial Cable (comes with your scanner in the box)
    Master Scanner:
    This is the scanner that has the programming that needs to be sent to the Slave.

    Slave Scanner:
    This is the scanner that needs the programming.

    Master Scanner
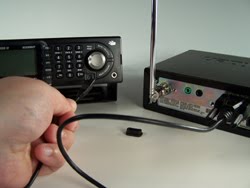
    Step 1 – First plug in the Uniden 4′ Serial Cable 9pin serial jack into the rear panel
    On the Master Scanner
    Step 2 – Press “Menu”
    Step 3 – Scroll and select to “Wired Clone”
    Step 4 – Select “Master”
    Step 5 – Select “Rear Port”

    Slave Scanner
    Step 6 -Plug the mini jack into the front of the scanner.
    On the Slave Scanner
    Step 7 – Press “Menu”
    Step 8 – Scroll and select to “Wired Clone”
    Step 9 – Select “Slave”
    Step 10 – Select “Front Port”

    Last steps…
    Step 11 – Hit Scan on Slave Scanner
    Step 12 – Hit Scan on Master Scanner

    ———————————————————————–

    Directions how to clone BC346XT or BCD396XT:

    Parts needed:
    >> 2 Uniden 4′ Serial Cable (comes with your scanners in the box)
    >> Null Modem
    >> Gender Changer
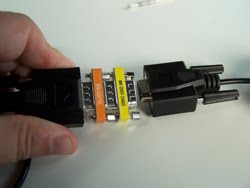
    Follow the steps below on how to make the cloning cable:
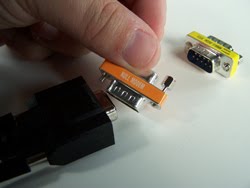
    Step 1 – Connect Uniden 4′ Serial Cable 9pin serial cable to Null Modem
    Step 2 – Connect the Null Modem to Gender Changer
    Step 3 – then connect the second 9pin serial cable to the Gender Changer, and your clone cable is made.
    Master Scanner:
    This is the scanner that has the programming that needs to be sent to the Slave

    Slave Scanner:
    Is the scanner that needs the programming

    Slave Scanner
    Step 4 – Plug the mini jack into the right side of the scanner.
    One the Slave Scanner
    Step 5 – Press “Menu”
    Step 6 – Scroll and select to “Wired Clone”
    Step 7 – Select “Slave”

    Master Scanner
    Step 8 – Then plug the mini jack into the front panel
    Step 9 – Press “Menu”
    Step 10 – Scroll and select to “Wired Clone”
    Step 11 – Select “Master”

    Last steps…
    Step 12 – Hit Scan on Slave Scanner
    Step 13 – Hit Scan on Master Scanner

  • Please follow and like us:
    RSS
    Follow by Email
    Twitter
    Visit Us
    Follow Me
    YOUTUBE